
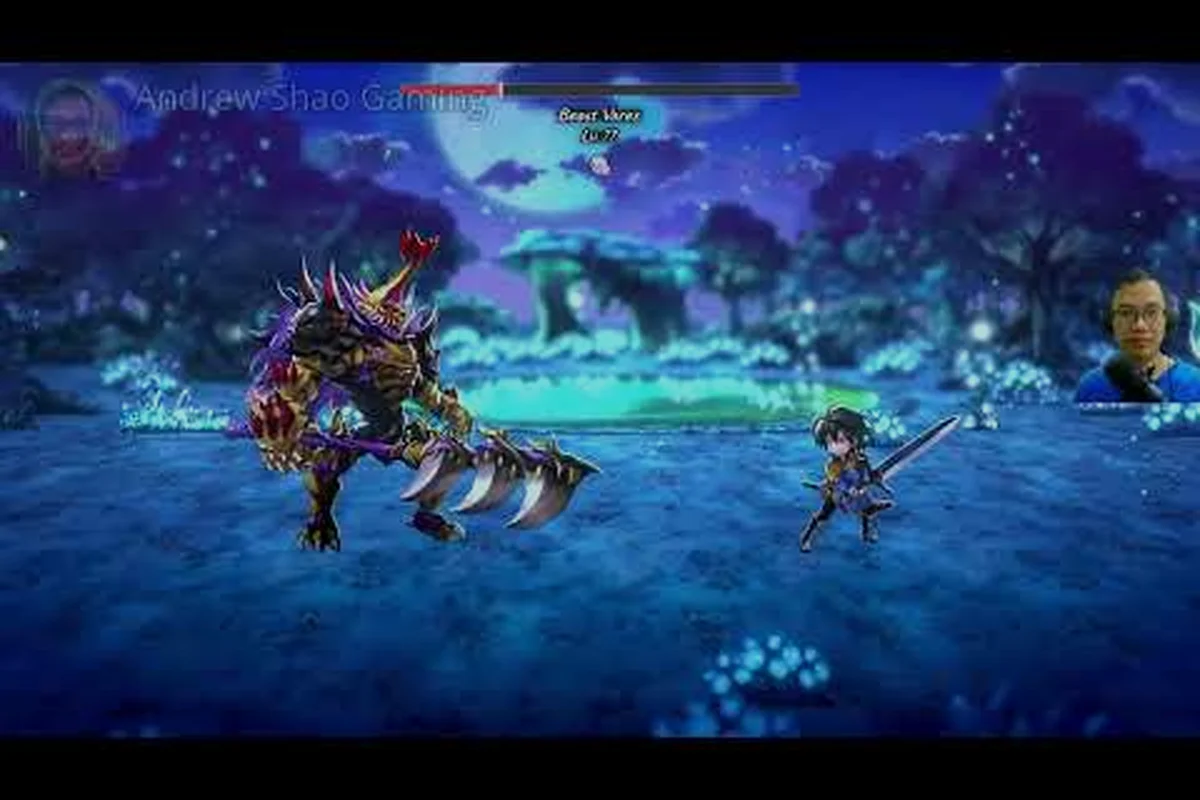
Boss fights in Another Eden Begins punish players who mash the strongest attack every turn, and this Another Eden Begins boss guide exists to fix exactly that. The remake's command-based battles reward reading enemy patterns, banking your Another Force gauge for the right moment, and building a party around synergy rather than raw stats. Below you'll find the mechanics that govern every major encounter, a breakdown of the Beast King and Yaksha fights, and team setups that community players have consistently used to clear the story without grinding.
How Another Eden Begins Boss Battles Actually Work
The battle system looks simple on the surface — pick a command, watch the turn resolve — but boss encounters layer several systems on top of that foundation. According to the official website, party synergy is what fills the Another Force gauge, which means the actions you take outside of damage-dealing turns still matter enormously. A healer who keeps everyone topped up is not just preventing deaths; they are actively charging the resource that lets you burst a boss down later.
Three mechanics define every tough fight in the game, from the Beast King encounter in the Moonlight Forest to the Yaksha boss later in the story arc. Each of these encounters punishes a different oversight: the Beast King's charged attacks demand careful type matching, while Yaksha punishes parties that ignore status ailment coverage. Bosses in Another Eden Begins follow a predictable turn structure — telegraphed moves, a vulnerable window, then an escalation — so learning to read that rhythm matters more than raw stats. The sections below break down how each pillar works in practice, with concrete examples drawn from the fights players most often struggle against.
-
Another Force gauge — builds through party actions and spends on a full-team burst turn; timing it around a boss's vulnerable phase is the single biggest damage multiplier available.
-
Type and weapon interactions — enemies telegraph their next move, letting you swap in a resistant character before a heavy hit lands.
-
Status ailments — poison, sleep, and stun effects are far more valuable against bosses than against regular mobs, because bosses take many turns and each afflicted turn compounds.
Understanding these three pillars is what separates a smooth clear from a wipe at 20% boss health. Players who treat bosses as damage races almost always lose, because most major encounters have an enrage-style pressure curve where healing demand grows faster than your output.
Reading Enemy Telegraphs
Every boss in Another Eden Begins announces its next action before it happens, and the UI highlights the target of that action. This is not decorative information — it is the core of the game's defensive play. When a boss telegraphs a multi-hit physical attack, you can move your squishiest damage dealer to the back line and absorb the hit with a front-line tank instead. When it telegraphs a buff, that is your window to land a stun or sleep before the buff takes effect.
Community reports consistently note that the Moonlight Forest boss and several mid-game encounters become dramatically easier once players stop ignoring the telegraph bar. A practical habit: before every command selection, spend two seconds checking what the boss will do next turn and who it targets. That single habit prevents more wipes than any gear upgrade.
When to Spend Another Force
The most common mistake in any Another Eden Begins boss fight guide discussion is spending Another Force the moment it fills. The gauge is most valuable when it converts into a kill window — a stretch of turns where the boss is staggered, buffed-against, or simply low enough that your burst ends the fight before its next big attack. Holding the gauge for one or two extra turns while the boss wastes actions on a heal or a missed telegraph is usually the correct play.
| Spending Pattern | Typical Result | Best Used Against |
|---|---|---|
| Spend immediately at full gauge | Wasted burst on high-HP phase | Almost never optimal |
| Hold for stagger window | Full burst lands during vulnerability | Mid-game story bosses |
| Hold for final 25% HP | Ends fight before enrage pressure | Beast King, final encounters |
| Split across two partial spends | Consistent damage, weak burst | Long attrition fights |
The table above reflects patterns reported by players across the Steam community, and while exact numbers vary by party composition, the principle holds: burst damage is worth the most when it shortens the fight, not when it merely chips the health bar.
Beast King Boss: The First Real Skill Check
The Beast King boss is where Another Eden Begins stops holding your hand, and most players searching for an Another Eden Begins beast king strategy hit this wall around the mid-game. The fight combines heavy physical pressure with periodic self-buffs, meaning a party that cannot answer buffs will watch the boss's damage climb until healing collapses. The encounter is beatable at the recommended level, but only if your turn order and Force timing are deliberate.
Beast King Attack Pattern and Counters
| Beast King Action | Telegraph Signal | Recommended Response |
|---|---|---|
| Physical combo (2-3 hits) | Claw icon, multi-target | Keep front line tanky, heal preemptively |
| Self-attack buff | Red aura animation | Stun or sleep before it resolves |
| Heavy single-target strike | Targeted character highlighted | Swap target to back line, guard |
| Low-HP enrage phase | Faster rotation, no buffs | Spend full Another Force to end it |
The critical insight for anyone working out how to beat the Beast King is that the buff turn is your damage window in disguise. While the boss spends a turn empowering itself, it is not attacking — that is a free turn for your healer to recover MP or for your support to stack debuffs. Players who panic during the buff phase and burn all their Force early often find the enrage phase unwinnable.
Recommended Party Composition for the Beast King
A balanced four-person front line with two reserves works best here. You want one dedicated healer, one tank-capable unit, and two damage dealers whose attack types the Beast King does not resist. Because the boss's heavy strike targets your biggest damage threat, rotating your DPS through the back line after each heavy telegraph keeps them alive without sacrificing output.
-
Healer: priority one; the enrage phase demands sustained healing output, so bring MP restoration items regardless.
-
Tank: absorbs the heavy strike and holds the front line during physical combos.
-
DPS x2: one physical, one magic, so you always have an option the boss is not resisting that turn.
-
Reserves: a status-effect specialist to land sleep or stun on buff turns, and a backup healer for long fights.
If you want a deeper look at how resistances shape these choices, the breakdown of boss weaknesses across the game covers which attack types each major encounter resists, and it pairs well with the party-building fundamentals in the beginner guide for players still assembling their roster.
Yaksha Boss: Status Pressure and Turn Control
The Yaksha boss fights differently from the Beast King, and that difference is the point — Another Eden Begins deliberately varies its encounter design so one party composition cannot trivialize everything. Yaksha leans on status ailments and turn manipulation, punishing teams that rely on a single damage rotation. Community players report that fights against Yaksha are lost to poison stacking and sleep disruption far more often than to raw damage. Since poison and sleep are exactly the kinds of status ailments that overwhelm unprepared teams, it's worth reviewing our Another Eden Begins Beginner Guide to build a roster with cleanse and resistance options before attempting the fight.
How the Yaksha Fight Plays Out
Yaksha opens with debuffs, then alternates between single-target pressure and area attacks that apply ailments. The fight's difficulty curve comes from attrition: your healer's MP drains faster than in most encounters because you are constantly cleansing or healing through status damage. Preparation matters more here than in any other mid-game fight.
| Yaksha Phase | Main Threat | Countermeasure |
|---|---|---|
| Opening turns | Debuffs on your party | Cleanse immediately; debuffed DPS lose tempo |
| Mid-fight | Poison and sleep application | Bring ailment-resistance gear or support skills |
| Area attack cycles | Party-wide chip damage | Pre-heal before telegraphed AoE, not after |
| Low HP | Faster ailment rotation | Spend Another Force to close the fight |
The single most valuable preparation for this encounter is ailment resistance. Whether that comes from equipment, support skills, or a party member with cleanse abilities, cutting Yaksha's status pressure in half turns a tense fight into a manageable one. Players who skip this preparation and rely on healing through everything often run out of MP around the 60% health mark, which is exactly when the boss's rotation speeds up.
Team Adjustments for Yaksha
Compared to the Beast King setup, you want to trade one DPS slot for a support unit with cleanse or ailment prevention. The damage loss is smaller than it looks, because a poisoned DPS dealing half damage every other turn contributes less than a clean rotation from three healthy units. Keep your Another Force gauge for the final phase — Yaksha's accelerated ailment rotation at low health is the moment a full-team burst pays for itself.
Moonlight Forest and Early Boss Encounters
The Moonlight Forest boss is many players' first taste of a fight that requires actual strategy, and it teaches lessons that carry through the entire game. This encounter sits in one of the game's most atmospheric zones, and community players frequently mention it as the moment they realized telegraph-reading was mandatory rather than optional. The boss hits harder than anything before it and mixes physical attacks with a periodic magic burst, so a party stacked entirely with physical defense will get caught off guard.
Preparation for this fight is straightforward but easy to skip. Level your healer's key skills before entering, stock healing items, and make sure at least one party member has a magic-resistant setup. The fight's pattern is simpler than the Beast King's — attack, attack, magic burst — but the damage numbers punish complacency. If you clear it comfortably, you are ready for the mid-game's harder checks; if you scrape through, spend time on the zone's side content before pushing forward.
For a full zone-by-zone breakdown of where this fight sits in the progression, the 1100 AD era guide maps the Moonlight Forest area, Baruoki Village, and the Kingdom of Miglance in order, which helps you plan when to grind and when to push the story forward.
General Boss Fight Strategy That Works Across the Game
Every specific fight aside, a set of universal habits will carry you through all of Another Eden Begins's major encounters, including the optional and postgame fights that test everything you have learned. These principles come up repeatedly in community discussions because they apply to virtually every boss in the game, from the earliest story checks to the secret encounters that chase players through New Game+.
The Pre-Fight Checklist
Before any boss door or story-triggered encounter — whether you're walking into the Beast King fight in the Moonlight Forest or a mid-chapter encounter like Yaksha — run through this list. The point is that Another Eden Begins bosses rarely kill you in the opening turns; they win through attrition, stacking status ailments and forcing you to burn resources while your Force gauge sits unused. A two-minute prep pass at the area's nearest inn and item shop costs far less than a failed attempt that sends you back to a checkpoint with all items consumed. Treat each item below as a gate: if any one fails, fix it before triggering the fight.
-
Full HP and MP on all active and reserve party members — reserves matter because swapping is free.
-
At least 10 healing items and 5 MP restoration items; bosses are long, and MP runs out before HP does.
-
One party member equipped or skilled for ailment resistance, since mid and late bosses lean on status pressure.
-
Another Force gauge at or near full — entering a boss fight with an empty gauge costs you your only burst window.
-
Attack-type coverage: confirm at least two damage types in your active lineup so a resistant boss cannot shut down your entire offense.
This checklist takes under a minute and eliminates the majority of avoidable wipes reported by players. The most commonly skipped item is the reserve check, which is a mistake — mid-fight swaps are one of the game's strongest defensive tools, and an empty back line removes that option entirely.
Managing the Damage-Healing Economy
Boss fights in this game are ultimately an economy problem: your healing output must cover the boss's damage output for as long as the fight lasts, and your damage must end the fight before that balance breaks. Every decision — when to heal, when to attack, when to spend Force — is a move in that economy. The practical takeaway is to heal preemptively when a big telegraph is coming, because healing after the hit means you spent a turn taking damage you could have prevented. Aggressive pre-healing is what community players cite most often as the habit that took their clears from barely surviving to comfortable.
If you are pushing into the game's hardest content, the guide to optional and superboss encounters covers the late-game fights where these economy principles get stress-tested. Encounters like the Beast King and the Yaksha boss in the Moonlight Forest chain punish reactive healing with multi-hit turns that can strip 60% of your HP pool in a single round, making pre-healing before telegraphed attacks non-negotiable. Those fights also demand tighter Another Force setups — banking enough Force gauge to extend your burst window into the boss's weakest turn — because a wasted Force cycle against superboss-tier HP bars often means one more rotation of damage your healers must cover.
Frequently Asked Questions
What level should I be before fighting the Beast King?
Community players generally recommend being at or slightly above the level the story suggests for that zone, with a fully skilled healer. Under-leveled parties can still win by leaning on stun timing and holding Another Force for the enrage phase, but the fight becomes significantly longer and more item-hungry.
How do I beat the Yaksha boss without a cleanse skill?
Stock ailment-healing items and equip any resistance gear you own, then prioritize killing pressure over sustain. Since Yaksha's threat scales with fight length, spending Another Force early in the mid-phase to shorten the encounter often works better than trying to outlast its status rotation.
When is the best time to use Another Force against bosses?
Hold the gauge until a kill window opens — usually the boss's final 25% health or a stagger phase right after a wasted buff turn. Spending it the instant it fills is the most common mistake, because burst damage is worth the most when it ends the fight rather than chipping an early health bar.
Does the Moonlight Forest boss respawn or can I refight it?
Story bosses do not refight in a normal playthrough, so treat the encounter as a one-time check on your party's readiness. If you barely survive, invest in the zone's side content before the next major fight, because difficulty escalates quickly from that point onward.
Do boss strategies change in New Game+?
The encounters keep their patterns, but your retained character strength from the first clear changes the math — fights that required careful Force timing can become straightforward damage races. That makes New Game+ a good place to experiment with unusual party compositions before tackling the game's secret bosses.
The through-line of this Another Eden Begins boss guide is simple: read the telegraphs, respect the Another Force gauge, and build parties with an answer to status pressure rather than a stack of damage dealers. The Beast King boss teaches buff management, the Yaksha boss teaches ailment preparation, and the Moonlight Forest boss teaches telegraph discipline — master those three lessons and every later encounter, from story climaxes to postgame superbosses, becomes a solvable puzzle instead of a wall.